How to Use a Moka Pot (Stovetop Coffee Maker)
Quick Answer
Making coffee with a Moka pot is easy on the wallet and simple to do. Fill the bottom chamber with water, spoon coarse coffee grounds into the filter basket, put the pot together, set it on the stove, and listen for that gurgling sound. As soon as it stops, take it off the heat. You’ll get a rich, full-flavored cup.
Key Takeaways
- Use coarse-ground coffee to prevent clogging and bitter taste.
- Never fill water past the safety valve.
- Remove from heat as soon as you hear gurgling.
- Clean your Moka pot after each use for longevity.
- A 2oz Moka coffee contains about 105mg of caffeine.
I still remember my first go at making Moka coffee. I used fine grounds, overfilled the water, and ended up with a brew so bitter I nearly gave up on it. Later, an Italian friend showed me the right way and that’s when I realized this small stovetop pot can make coffee that tastes as good as drinks from pricey cafés.
What is a Moka Pot?

The simple truth is that even though people call it a stovetop espresso maker, it’s not making real espresso. What you get is called Moka coffee, and yes, it’s different.
Moka coffee and espresso can taste close, but they’re not the same drink. The biggest change is in the crema which is that creamy layer on top of espresso. You won’t usually get that with a Moka pot, because it doesn’t use the same high pressure an espresso machine does.
The names “Moka pot” and “stovetop espresso maker” mean the same thing. In this guide, we’ll use them interchangeably. Just keep in mind there’s a small difference in the coffee they make.
Here’s what happens when you brew. The water in the bottom heats up and turns to steam. Pressure pushes that hot water up through the coffee grounds. The fresh coffee gathers in the top, ready for you to pour.
One quick note – some people call Moka pots “coffee percolators.” They’re not the same. A percolator sends the brew through the grounds over and over. A Moka pot only pushes the water through once.
What You'll Need to Make Stovetop Coffee
Making coffee with a Moka pot doesn't require fancy equipment. Here's all you need:
- A Stovetop Espresso Maker: This is your new best friend.
- Coffee Beans: Get some good ones, they make all the difference.
- A Coffee Grinder: Set it to a fairly coarse grind.
- Cold, Filtered Water: Because good water equals good coffee.
- Heat Source: A stove is all you need.
The process takes about 5 minutes and typically yields 2 cups of rich, flavorful coffee.
Using a Stovetop Espresso Maker: Step-by-Step Instructions
Ready to make some stellar coffee with your stovetop maker? Let's dive right into the steps you need to follow. It's really simple once you get the hang of it.
Step 1: Prep Your Moka Pot

First things first - let's set up your Moka Pot. It's made up of three main parts:
- The Bottom Chamber: This is where you'll add the water.
- The Filter Basket: This is for your coffee grounds.
- The Upper Chamber: Here's where your coffee will end up.
Step 2: Grind the Coffee
Grab your coffee beans and a grinder. Now you might think you need a very fine grind like you see in coffee shops - hold up! Too fine can mess up your brew in a Moka pot. It can clog and might even lead to a bitter taste. So go for a coarser grind. It makes a big difference.
Step 3: Add Water

Time to add water to the bottom chamber of your coffee maker. Just use cold filtered water for the best taste. And also make sure you notice the little valve on the side. Don't fill the water past this safety valve to prevent any pressure problems.
Step 4: Add the Coffee Grounds
Now take your filter basket and fill it to the brim with those coarsely ground coffee beans. Make sure it's packed full because not filling enough can mess with the brewing process. Once it's filled, you're ready for the next part.
Step 5: Put It All Back Together
First, drop the filter basket into the lower chamber that's already filled with water. Now twist the upper part on top of the base. Remember you don't need to use excessive force. Just tighten it just enough so it's snug. Over-tightening could damage the threads or the gasket.
Step 6: Turn Up the Heat

Here's the easy part. Put your coffee maker on the stove, light it up and wait for the water to boil. It usually doesn't take long because these pots are very small.
Stay close by; you don't want to miss it when it starts boiling. If you're using a gas stove, watch that the flame isn't licking the handle or else it could melt if it's plastic.
Step 7: Serve and Savor
Listen for that gurgling sound because that's your signal that the coffee has traveled up into the upper chamber and it's ready to pour. As soon as you hear it, take the pot off the stove.
Quick tip: don't let it sit on the heat after it starts gurgling or your coffee might get a burnt taste. That's definitely not what you want after all this effort!
|
Step |
Description |
|
Prep the Moka Pot |
Familiarize yourself with the three parts: bottom chamber, filter basket, upper chamber. |
|
Grind the Coffee |
Grind coffee to a medium-coarse level to avoid clogging or bitterness. |
|
Add Water |
Fill the bottom chamber with cold filtered water up to the safety valve. |
|
Add Coffee Grounds |
Fill the filter basket with coarsely ground coffee, level it off but don’t tamp. |
|
Assemble the Pot |
Assemble all parts snugly without over-tightening. |
|
Heat the Pot |
Place on stove; heat until you hear gurgling indicating brewing is done. |
|
Serve and Enjoy |
Remove from heat immediately and pour your coffee. |
Alternative Methods for Brewing with a Moka Pot
Brewing coffee in a Moka pot is very straightforward, but did you know there are different ways to tweak the process for varied flavors? I'll walk you through two alternative brewing techniques I use with my Moka pot.
Method 1: The Traditional Approach

This first method is what you might call the classic way to use a Moka pot. If you've used a Moka pot before, this will probably feel very familiar. Here's how it goes:
Water Prep: Start by filling the bottom chamber with water up to the fill line. For those curious, it's usually about 140 grams of water.
Heating Up: Place the chamber directly on your stove and heat the water.
Grind Your Coffee: During water heating, grind about 18 grams of coffee. The grind shouldn't be too fine—think not quite espresso-fine. This avoids clogging and potential mishaps.
Assemble and Brew: Put the coffee in the filter basket, assemble the Moka pot and then place it back on the stove. Leave the lid open and watch the magic happen.
Watch for the Gurgling: Once you hear the gurgling sound, your coffee is ready. Be sure to remove the pot from the heat right away to avoid burning your brew.
This method is very simple and doesn't require any fancy tools. You just need your Moka pot, some coffee and a heat source.
Method 2: The Low and Slow Technique

For this second method, we change a few things to get a different result. Here’s how it goes:
Water Setup: Same as before, fill the base with 140 grams of water.
Coarser Grind: Grind your coffee a bit coarser this time. About 14 grams should suffice. This slight change slows the extraction.
Heat Adjustment: Place the Moka pot on the stove and turn the flame as low as it will go. Slow heat lets the coffee take its time. That extra time builds more flavor in the cup.
Patient Brewing: This one’s about waiting. It’s slower, but the reward is a richer and deeper taste.
Finish with a Hiss: Like in the first method, the hiss means it’s ready. Pull it off the heat right away so the flavor stays fresh.
This slow method is great if you like a layered taste, close to what you get from a French press or pour-over coffee.
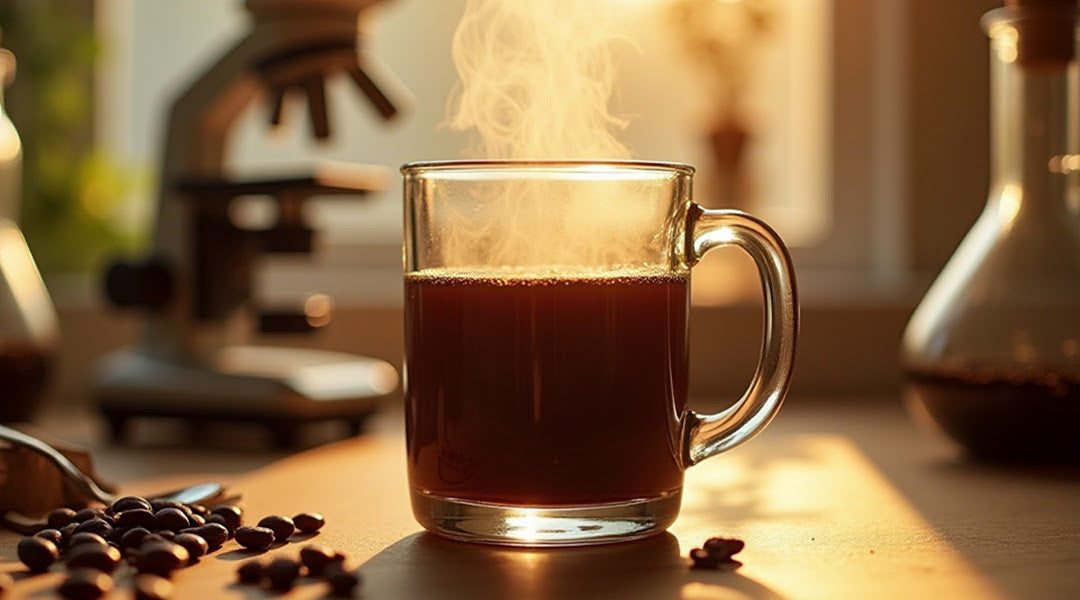
Caffeine Levels in Stovetop Espresso Coffee
Caffeine is one of the reasons most of us reach for coffee in the first place. Knowing how much you’re drinking helps you keep track.
So how does Moka coffee stack up? Here’s a quick look:
- Regular cup of coffee (8 oz): about 105 mg of caffeine
- Shot of Moka coffee (2 oz): also, about 105 mg of caffeine
- Shot of espresso (2 oz): about 93 mg of caffeine
Yes, you read that right—a 2 oz shot of Moka coffee packs the same caffeine punch as an 8 oz cup of traditional coffee. And it even has more caffeine than a shot of espresso from a machine!
Why? The Moka pot pulls more from the coffee grounds, including caffeine. That often makes it stronger and a bit higher in caffeine. If you need a serious wake-up, the Moka pot can deliver.
Keep in mind, these numbers change based on the beans and how you brew. Use them as a guide, not an exact rule.
Tips for Better Moka Pot Coffee

1. Pre-heat the water: Fill the bottom chamber with hot water before brewing. It speeds things up and keeps the grounds from overheating before the brew starts.
2. Don’t tamp the grounds: This isn’t an espresso machine. Just fill the basket, level it off, and leave it loose.
3. Keep your pot clean: Old coffee oils can spoil and mess up the taste. Rinse after every use, but skip harsh cleaners that can damage the aluminum.
4. Replace gaskets often: The rubber seal should be swapped out every 6–12 months depending on how much you use it. A worn gasket can cause steam leaks and weak brewing.
5. Let it cool before cleaning: Pouring cold water over a hot aluminum pot can bend it out of shape over time. Wait until it’s cooled before rinsing.
Final Thoughts
And that’s it. You’ve got the know-how to make coffee on a stovetop espresso maker. If you’ve followed each step, you’re probably holding an empty Moka pot in one hand and a bold cup of coffee in the other. So, how’s it taste? Hopefully just as good as you imagined.
The charm of Moka pot coffee is in its mix of ease and flavor. It sits right between drip coffee and espresso – strong, rich, and full of character without the price tag of a big machine. With a little practice, you’ll be brewing coffee so good it might keep you from walking into a café again.
Now if you want to take your Moka pot coffee to new heights you can try our medium roast coffee beans. They are specially selected to deliver the best flavor when brewed in a stovetop coffee maker.
Frequently Asked Questions (FAQs)
How long does it take to brew coffee with a stovetop espresso maker?
A Moka pot usually needs about five minutes to brew. Add time to grind beans and set up, and you get about ten to fifteen minutes from start to sip. Keep the cleanup simple and steady – a clean pot makes better coffee and lasts longer. Rinse, dry, and reassemble so it’s ready for the next cup. Clean parts make clean tasting coffee, always.
Which stovetop coffee maker is the best?
The Bialetti Moka Express is the safe pick. It makes bold coffee fast without losing taste or quality. It’s easy to wash and it is built tough. Style helps too. There is a clear gap between a bargain Moka pot and a well-made one. Start with the Bialetti if you want a smart choice.
How should you grind coffee for a stovetop espresso maker?
Use a medium coarse grind, close to what you use for a French press. Too fine can cause leaks and sour notes. Too coarse can taste weak. However, every Moka pot is a bit different, so it's worth experimenting with various grind sizes to find what works best for your taste.
Can Moka pot coffee taste as good as espresso from machines?
Moka coffee is rich and strong, but it’s not the same as machine espresso. The reason is pressure – Moka pots don’t reach that level. Still, many people love the deep, robust taste they brew. It comes close enough for daily joy. Small cup, big flavor.
Is a Moka pot easy to maintain?
Yes. Care is simple. Wash it often and do not over tighten when you put it back together. From time to time, swap the rubber gasket and the metal filter. How often depends on how much you brew. Fresh parts keep the seal snug and the taste clean.
About the author
This article was written by the Lifeboost Coffee team with years of hands-on brewing. Our coffee crew tried these methods with different beans and grind levels to confirm the results shared here.
Disclaimer: The information in this article is for educational purposes only. Results may vary based on your gear, coffee, and brewing method. Always follow maker instructions when you brew with a Moka pot.
Check out Lifeboost Coffee Grata Medium Roast.